Last updated: August 11, 2026
- – Aim for about 100 to 120 compressions per minute.
- – Reassess after about 2 minutes, then resume if needed.
- Use a 100 to 120 compressions-per-minute pace if you know it from CPR training, as a rough benchmark.
- How perform cpr on dog: step-by-step guide pet owners is not a “wait and see” situation.
Quick answer: Unconscious, not breathing, no pulse — that is the moment to start CPR on your dog right away and keep going in roughly 2-minute cycles until an emergency veterinarian takes over. Should your dog still be breathing, even weakly, get to the vet fast. This guide on how perform cpr on dog: step-by-step guide pet owners explains what to check, what to do first, and how the steps change by dog size.
Key facts
– CPR is for cardiac arrest or near-arrest, not every collapse.
– Check breathing and pulse in a few seconds, not a minute.
– Give 2 rescue breaths before you begin compressions.
– Aim for about 100 to 120 compressions per minute.
– Reassess after about 2 minutes, then resume if needed.
– Call the emergency vet as soon as CPR starts.
– Even if your dog revives, emergency care is still needed.
No breath. No pulse. Start now while someone else calls an emergency veterinarian. That is the short answer. How perform cpr on dog: step-by-step guide pet owners is not a “wait and see” situation. Delay shrinks the odds, plain and simple. I’ll walk you through what to check, what to do first, and how the steps shift with your dog’s size and condition.
First, Decide Whether CPR Is the Right Move
Unconscious, not breathing normally, and no pulse? Then CPR is the right move. A collapse with breathing changes things. Should your dog be breathing but weak, cyanotic, or clearly struggling, the next step is fast transport to an emergency vet, not chest compressions.
The error I see most often in CPR guides is starting with compressions and skipping the decision point. That matters. CPR is for cardiac arrest or near-cardiac arrest, not for every fainting spell. You do not need to be perfect to help. You do need to aim at the right problem.
Here is the quick decision path I would use:
- Call your nearest emergency veterinary clinic or have someone else do it immediately.
- Check whether your dog responds to voice and touch.
- Look for chest movement and feel for air at the nose.
- Check for a pulse in the femoral artery on the inside of the rear leg.
- If there is no normal breathing and no pulse, start CPR at once.
Do not linger on the pulse check. A few seconds, that’s it. A delayed start is worse than a slightly imperfect one. The American Red Cross and the American Veterinary Medical Association both emphasize immediate action in a true emergency; for veterinary-specific emergency care, the AVMA is a good reference point. The Cornell University College of Veterinary Medicine also offers practical emergency guidance for pet owners.
Choking, gagging, or obvious breathing effort? Different emergency. Open the mouth only if you can do it safely, and do not blindly sweep with your fingers if you feel nothing you can remove. A stuck object can slide deeper. Ugly, but true.
Quick check: No breathing and no pulse? Go straight to CPR. Breathing, even badly? Rapid veterinary care comes first.
How to Perform CPR on a Dog Step by Step

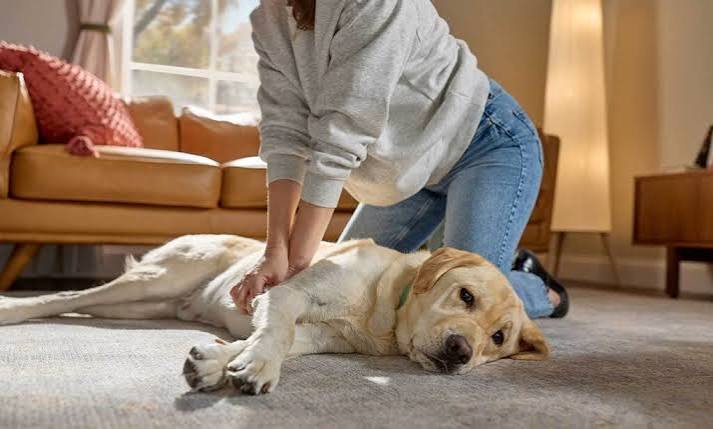
No breathing and no pulse means a simple sequence: open the airway, give rescue breaths, start chest compressions, then keep cycling until your dog breathes, a heartbeat returns, or a veterinarian takes over.
Here is the step-by-step path I would follow.
- Lay your dog on a flat surface. A firm floor is better than a couch or bed.
- Extend the neck and open the airway. Pull the tongue forward if you can do it safely.
- Close the mouth and seal your mouth over the nose. Blow until you see the chest rise.
- Give two rescue breaths. Each breath should be enough to make the chest rise, not inflate the dog like a balloon.
- Start chest compressions. Push hard and fast at the widest part of the chest, then let the chest recoil fully.
- Keep a steady rhythm. Use a 100 to 120 compressions-per-minute pace if you know it from CPR training, as a rough benchmark.
- After about two minutes, reassess quickly. Check for breathing and a pulse for only a few seconds, then resume if needed.
- Continue until help arrives or your dog responds.
The breathing step matters more than many people think. In dogs with respiratory arrest, oxygenation can fail before the heart stops. Rescue breaths can save the day if the heart is still beating. But when the heart is already gone, compressions become the main event.
Hand position depends on size and chest shape:
- Small dogs and most cats: one hand or both hands over the widest part of the chest may work better than a full two-hand press.
- Medium and large dogs with a barrel chest: compress over the widest part of the chest, usually with both hands.
- Deep-chested dogs: the point of contact may need to be adjusted based on where the heart sits and where the chest wall gives you the best compression.
Do not lean on the chest between compressions. Full recoil helps blood flow. If you are exhausted, switch with another person if possible. A tired rescuer compresses worse, and sloppy compressions are not harmless.
If you remember just one thing, make it this: breaths plus compressions plus immediate transport. CPR is not the finish line. It is the bridge.
Quick check: Flat surface, open airway, no pulse or breathing? You are in full CPR mode.
Where to Put Your Hands on Different Dog Sizes
Tiny, narrow-chested, barrel-chested, deep-chested — each one changes how CPR works. Generic advice falls apart here.
For a small dog, the easiest path is often to compress the chest with one hand around the rib cage or with thumbs on one side and fingers on the other, depending on size. For a medium or large dog, place both hands over the widest part of the chest. For a deep-chested dog, you may get better compressions over the area where the heart is most accessible rather than exactly over the middle of the rib cage.
The goal is not elegance. Blood flow. That’s the whole point.
| Situation | Best Path | Why Other Options Fail |
|---|---|---|
| Small dog or puppy | Use one-hand or encircling compressions if the chest is narrow | Two full hands can flatten the chest too much and make it hard to control depth |
| Medium dog | Use two-handed compressions over the widest chest area | Too little force can fail to move blood |
| Large barrel-chested dog | Use both hands and compress firmly at the widest part of the chest | Shallow, hesitant presses do not generate enough pressure |
| Deep-chested dog | Place hands where the chest gives the best compressive response; adjust if the first spot feels ineffective | A fixed “one-size-fits-all” hand position can miss the most effective point |
| Very painful or injured dog | Minimize movement, but still compress if there is no pulse | Waiting for perfect positioning can waste critical minutes |
Should you compress from the side or from above? Honestly, it depends on body shape. Lateral chest compressions can work well for many dogs, especially when the chest is deep or barrel-shaped. If you trained in a specific method, follow that method. If you did not, aim for the area that lets you compress the chest most effectively and consistently.
One practical note: a harness can get in the way. Remove it if it slows you down, but do not waste time on clothing unless it truly blocks your hands.
Quick check: Tiny, medium, large, or deep-chested — match your hand position to the chest shape, not a single universal rule.
Rescue Breaths, Choking, and When Breathing Changes the Plan
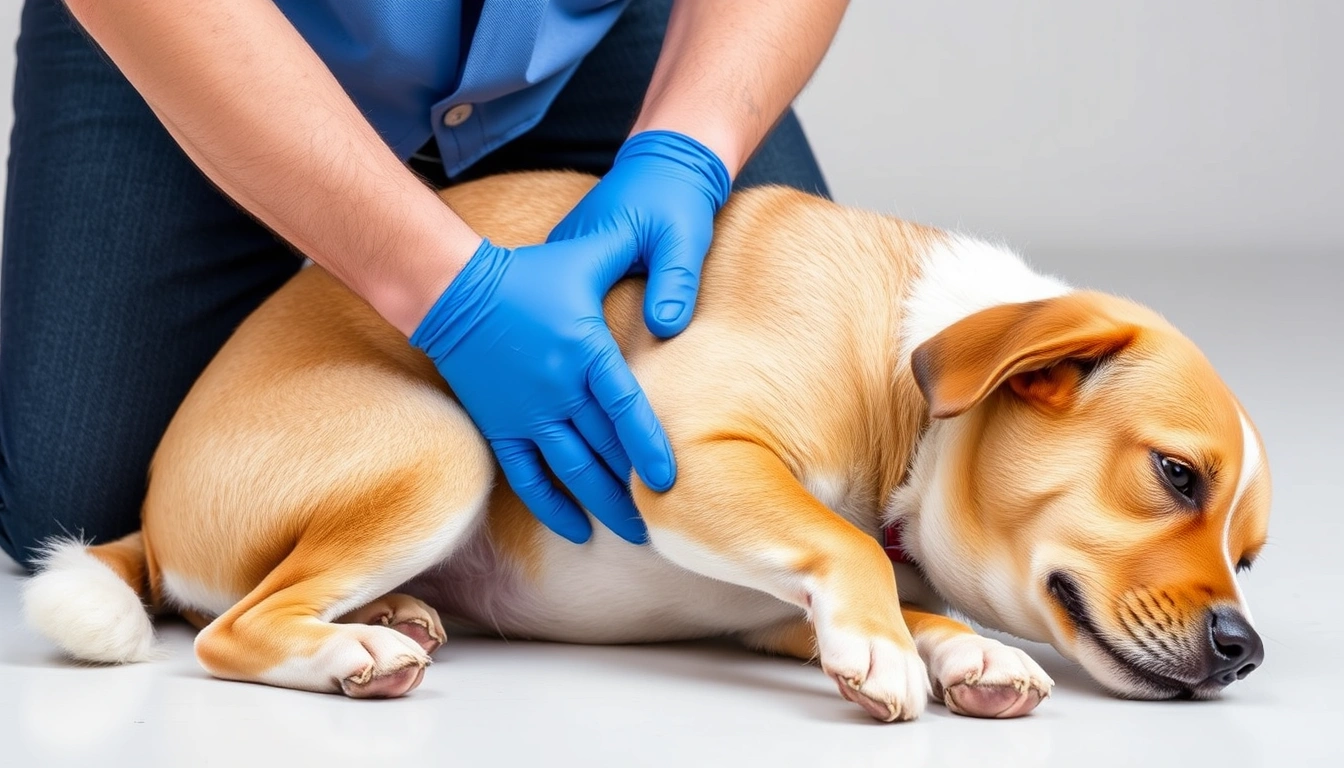
Not breathing but still has a pulse? Then rescue breaths matter a lot. Choking is a different problem from a stopped heart. Vomit, fluid, or foam in the mouth can also block the airway before breaths do any good.
Start with the mouth. Open it only if it is safe. Look for an obvious object. If you can remove it easily, do so. If not, do not dig around blindly. Once the airway looks as clear as you can make it, close the mouth, seal over the nose, and give a breath that lifts the chest.
A useful rhythm is:
- Check that the airway looks open.
- Give one rescue breath and watch the chest rise.
- Give a second breath.
- Return to compressions if there is no pulse or if the heart has stopped.
- Recheck briefly every couple of minutes.
If your dog is choking but still conscious, CPR is not the first move. Try to get the object out only if it is visible and easy to grasp. If the dog collapses, then move into CPR. Should your dog be breathing weakly but not well, you may need assisted breaths during transport, but do not stop to “wait and see.”
Here is the blunt part: CPR is messy. Vomit, saliva, and blood can get in the way. That does not mean you stop. It means you do the best you can and get to the vet fast.
For CPR guidance, I would also trust training materials from the American Red Cross for general resuscitation principles and veterinary emergency resources from the AVMA or a veterinary emergency hospital. For a real emergency, a local ER vet is the source that matters most. The American Red Cross, AVMA, and Cornell all provide material that supports the same basic priority: act fast, then transfer care.
Quick check: Choking but awake? Focus on airway relief. Not breathing and no pulse? Use rescue breaths and compressions together.
What to Do While CPR Is Happening
With another person there, split the work. One person does CPR, one person calls the emergency vet, and one person gets the car ready. Alone? Start CPR first, then call as soon as you can without leaving your dog unsafe.
The support steps matter just as much as the compressions:
- Call ahead. Tell the clinic your dog is in cardiopulmonary arrest and you are coming now.
- Keep CPR going during transport if possible. If you have another person, let them continue compressions in the car only if they can do it safely.
- Use a blanket or towel for warmth. A collapsed dog can lose heat fast.
- Keep the airway straight. Do not bend the neck into a tight curve.
- Watch for a change in breathing or movement. If your dog starts breathing normally, stop compressions and get to the vet immediately.
Forget perfect equipment. A towel, a flat board, and your hands are enough to start. A CPR mask or pet-specific resuscitation mask can help with safer rescue breaths, but it is not required if you are already in an emergency and it is not within arm’s reach. If you can keep a pet first-aid kit in the car, do it before the emergency, not during it.
If your dog responds, the crisis is not over. A dog that comes back after CPR can still crash again. I would still head to emergency care even if your dog wakes up, breathes, or moves. The underlying cause has not been fixed.
One trade-off worth saying out loud: CPR can be physically hard and emotionally brutal. It can also cause rib injury. That risk is real, but in cardiac arrest the alternative is often death. So the balance still favors action.
Quick check: Another person? Divide tasks. Dog revives? Keep going to the vet anyway.
Edge Cases Where the Usual Advice Breaks Down
Special circumstances call for adjustments.
-
Situation: Your dog is drowning or has inhaled fluid.
What changes: The airway may contain water or vomit, and breathing may fail before the heart.
What to do instead: Clear visible fluid from the mouth, give rescue breaths, and move quickly into compressions if there is no pulse. -
Situation: Your dog is hit by a car or has major trauma.
What changes: Chest injury, internal bleeding, or spinal injury may be present.
What to do instead: Minimize movement, but still start CPR if there is no pulse and no breathing. Transport immediately. -
Situation: Your dog is very large and hard to move.
What changes: Getting the dog onto a firm surface is difficult, and compressions may be awkward.
What to do instead: Work with the body position you can manage quickly. A hard surface under the chest matters more than perfect setup. -
Situation: Your dog is flat-faced and struggling to breathe.
What changes: Airway obstruction and upper-airway collapse are more likely than sudden cardiac arrest.
What to do instead: Focus on opening the airway, keeping the neck straight, and going to emergency care fast. CPR is only for arrest. -
Situation: Your dog has a pacemaker or known heart disease.
What changes: Collapse may still be a true arrest, but not every faint is one.
What to do instead: Check breathing and pulse quickly, then decide. If there is no pulse, start CPR without delay. -
Situation: Your dog has been down for an unknown amount of time.
What changes: The chance of successful resuscitation drops the longer the arrest has lasted.
What to do instead: Still try CPR if there is any doubt and the dog is warm, but move with urgency to a veterinarian.
This is the part most generic articles skip: CPR is not one fixed script. It is a response to a specific emergency. The better you sort the emergency, the better your actions.
Quick check: Trauma, drowning, airway collapse, or prolonged downtime? The CPR plan still applies, but transport and airway priorities change.
What You Should Learn Before the Emergency Hits
Healthy today? That is the time to prepare. A five-minute read during an emergency is too late. A CPR class, a saved emergency number, and a basic pet first-aid kit can save several minutes when every second counts.
Before you need it, learn where the nearest 24-hour veterinary hospital is. Save the number in your phone. If you live far from emergency care, map the route now. In many places, a 10- to 20-minute delay is the difference between arrival and collapse.
It helps to know your dog’s normal behavior, too. A fast heart rate, weak breathing, or sudden collapse can look different in a puppy than in a 12-year-old large breed dog. If your dog has a heart murmur, airway disease, or prior fainting spells, ask your vet what warning signs they want you to watch for.
Finally, practice the basics without pressure. Where is the femoral pulse? How do you get the tongue forward? How do you lay your dog on a flat surface quickly? Those steps are simple when you are calm and much harder when you are scared.
CPR for dogs is not glamorous, and it is not guaranteed. It is a best-effort emergency response that buys time. Remember the sequence, stay calm, and move fast; that gives your dog the best chance you can.