Last updated: October 22, 2026
In short: the right emergency, disaster, and evacuation gear is the kit that gets you out fast, keeps you alive for 72 hours, and does not become dead weight when you are tired, cold, wet, or scared.
This guide to emergency, disaster, and evacuation gear is for the person who needs a practical evacuation setup, not a fantasy bunker. If you live in wildfire country, a floodplain, tornado alley, or anywhere power can fail for a day or a week, the question is not “What should I own?” It is “What should I grab in 5 minutes, carry in one trip if possible, and trust when roads, phones, and stores are failing?”
Key Takeaways
- Build for movement first. A pack that is too heavy gets left behind.
- Water, light, communication, documents, and clothing beat novelty gear every time.
- A 72-hour evacuation bag is useful; a car kit and a home stash solve different problems.
- The best gear depends on hazard type; wildfire smoke, floodwater, ice storms, earthquakes, and hurricanes do not demand the same kit.
- Buy gear that works without power, apps, or proprietary chargers.
- The weak link is usually not the flashlight. It is batteries, documents, shoes, or not knowing where the bag is.
What emergency, disaster, and evacuation gear is for
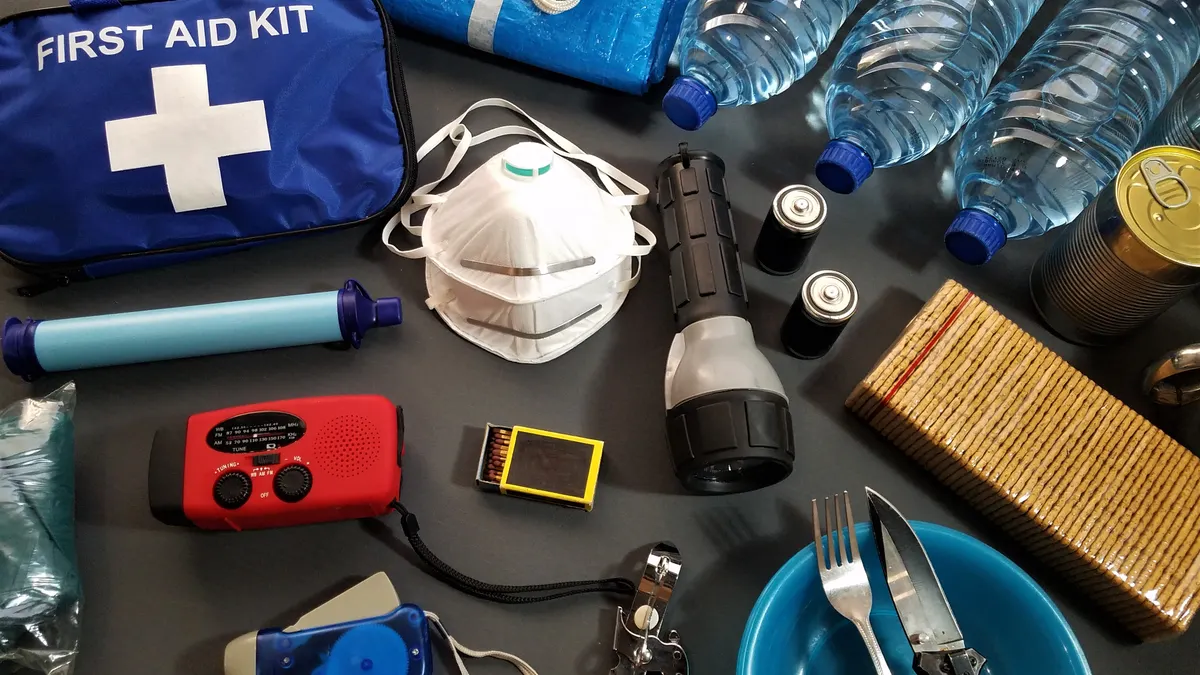
Emergency, disaster, and evacuation gear is the set of items that lets a person leave quickly, shelter temporarily, and handle basic needs when normal services are down.
The useful way to think about it is by job, not by product. A flashlight is not “preparedness” by itself. It is a tool for three jobs: seeing at night, moving safely through a damaged building, and signaling for help. The same is true for food, blankets, radios, chargers, and copies of records. Each item should earn its place by solving a problem during a real evacuation.
A generic article often gets this wrong by treating one bag as if it solves every disaster. It does not, and if you are unsure what your situation requires, consult local emergency managers or a clinician for hazard-specific guidance. A wildfire evacuation may involve ash, traffic, and smoke inhalation. A flood may mean contaminated water, road closures, and no basement access. An ice storm can trap you at home for 24 to 72 hours with no heat. Earthquakes may rupture gas lines and block exits. The gear changes with the hazard, but the core stays the same: water, shelter, light, communication, medication, documents, and sturdy footwear.
The most reliable benchmark for a baseline kit is the standard 72-hour window used by many emergency planners. That does not mean every emergency ends in three days. It means a compact kit should cover the first 72 hours without assuming immediate rescue or open stores.
If you need one sentence to keep in mind, use this: the best emergency gear is the gear you can find, carry, and use in the dark.
What should be in an evacuation bag?
An evacuation bag should hold water, calories, light, a radio, medicine, documents, clothing, hygiene items, cash, and a few tools that do not depend on cell service.
The bag does not need to be large. A 20- to 35-liter backpack is usually enough for one adult for a short evacuation if the contents are chosen carefully. Bigger is not automatically better; a heavy bag slows movement, strains shoulders, and gets abandoned. A family kit can live in a small duffel or tote in the car, but each adult should have a personal grab-and-go pack.
Here is the core list that belongs in most evacuation bags:
- Water: enough for immediate movement, plus a way to treat more
- Food: shelf-stable, ready-to-eat food for each person
- Light: one headlamp and one small flashlight
- Power: power bank plus charging cable for the phone you actually use
- Radio: battery-powered or hand-crank NOAA weather radio in the U.S.
- Documents: IDs, insurance, prescriptions, contact list, and emergency numbers
- Clothing: 1 full change, socks, underwear, hat, and weather layer
- Footwear: real walking shoes or boots, not slippers or sandals
- Health items: prescription meds, inhaler, glasses, contact lens supplies, first-aid basics
- Hygiene: wipes, hand sanitizer, toilet paper, menstrual supplies, trash bags
- Cash: small bills in case card readers and ATMs are down
- Tools: multitool, whistle, small roll of duct tape, lighter or matches in waterproof packaging
The National Weather Service and NOAA both emphasize weather alerts and radio coverage in emergencies; a battery-powered NOAA Weather Radio is still a practical tool when cell networks fail. For general preparedness guidance, the Ready.gov emergency supply list is a solid reference: https://www.ready.gov/kit
That list works best when you pack around real constraints. You may not have time to pack neatly. You may be carrying a child, a pet carrier, or a laptop. You may be leaving at night. That is why the bag should be packed by zones: grab items on top first, documents in a flat pouch, medications in a clearly marked pouch, and water where it will not crush fragile items.
One more practical rule: if the bag is stored in a hot garage or car trunk for months, inspect it on a schedule. Heat degrades batteries, food, adhesive, and some plastic packaging.
Emergency, disaster, and evacuation gear by hazard type
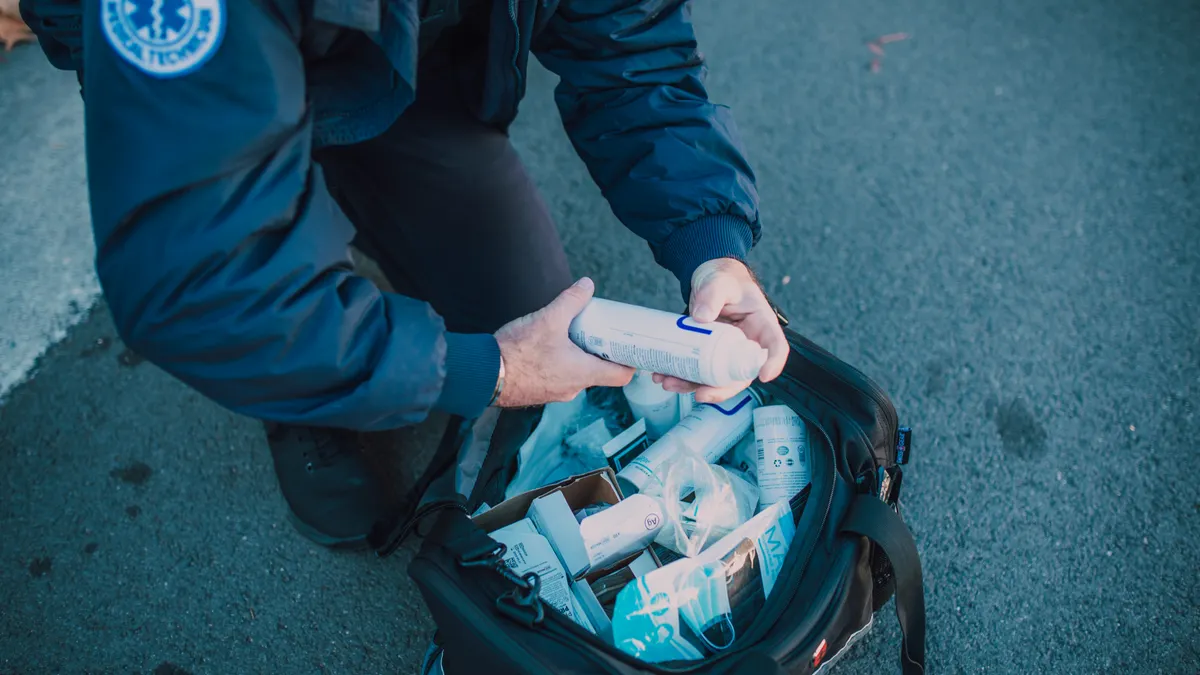
Emergency, disaster, and evacuation gear should change with the hazard, because the wrong kit can waste space and delay escape.
A flood kit is not the same as a wildfire kit. A winter storm kit is not the same as a tornado kit. The core stays familiar, but each hazard adds specific equipment and rules.
Wildfire
Wildfire evacuation gear should prioritize smoke protection, fast loading, and documents you can grab in under 2 minutes.
Add these items:
- N95 or better respirators for adults and older children
- Safety glasses or wraparound eyewear
- Cotton or wool layers that are less likely to melt than synthetic fleece
- A car charger and a full gas tank before fire season
- A printed map in case GPS routes are overloaded
- Pet carriers and leash/harness backups
A good respirator matters more than most people expect. The N95 standard means the respirator filters at least 95% of airborne particles under test conditions. It is not a perfect seal, but it is much better than a cloth face covering for smoke. For respirator guidance, the CDC/NIOSH page on respirator basics is a reliable source: https://www.cdc.gov/niosh/npptl/topics/respirators/disp_part/default.html
Who this is not for: if you have severe asthma, COPD, or another respiratory condition, do not assume an N95 alone is enough. Talk with a clinician about what is safe for you before fire season. During an active event, follow local public health guidance.
Flood
Flood evacuation gear should focus on contamination, wet conditions, and the fact that roads may disappear.
Add these items:
- Waterproof bags or dry sacks for documents and electronics
- Extra socks and shoes that can handle wet pavement
- Heavy-duty trash bags
- Gloves for debris and dirty water
- A small bottle of unscented bleach only if public guidance says it is safe to use for water treatment or surface cleaning
- A hand pump or battery pump if you have sump-related concerns at home
- Spare prescription copies because pharmacies may be closed or inaccessible
Floodwater is not just water. It can carry sewage, chemicals, and sharp debris. That means open cuts, bare feet, and loose bags are a bad combination. If evacuation is likely, move items up from the floor and keep the bag off basement levels.
A typical mistake is storing important paper records in a basement file box. That box is often the first thing ruined in a flood. Scan or photograph key documents and keep the originals in a waterproof pouch at an accessible height.
Winter storm or ice storm
Winter storm gear should keep you warm if the heater dies and keep you alive if roads close.
Add these items:
- Wool or synthetic insulating layers
- Hat, gloves, and neck gaiter
- Emergency blankets or a proper sleeping bag rated for your climate
- Chemical hand warmers
- Traction aids for boots
- Small snow shovel if you must travel by car
- Extra windshield washer fluid rated for low temperatures
If you are sheltering at home, the danger is often carbon monoxide. A battery-powered carbon monoxide alarm is not optional if you use any fuel-burning heat source, fireplace, generator, or camp stove indoors. The Consumer Product Safety Commission warns against using generators indoors or even in attached garages. See CPSC guidance here: https://www.cpsc.gov/Safety-Education/Safety-Guides/Home/Generators
The trade-off in winter is bulk. Warmth takes space. A compact emergency blanket is useful, but it is not a sleeping bag. A sleeping bag is warmer, yet it takes more room. If your region sees long power outages and subfreezing nights, carry the warmer option.
Earthquake
Earthquake evacuation gear should be stored where you can reach it after shaking, not buried in a closet.
Add these items:
- Sturdy shoes by the bed
- Work gloves
- Dust mask or respirator for dust and debris
- Small pry tool or multi-tool
- Flashlight clipped to the bedframe or near the bed
- Portable phone charger
- Whistle for signaling if trapped
In earthquake country, the first job is not “pack the car.” The first job is to get out of the building safely after the shaking stops and check for hazards such as gas leaks, broken glass, and falling debris. The gear should be close to the exit. A bag locked in a garage behind a fallen door frame is a failed design.
Hurricane
Hurricane evacuation gear should assume long outages, humidity, and water on the road.
Add these items:
- Waterproof pouch for documents
- Power banks with cables
- Cash in small denominations
- Plastic sheeting or trash bags for temporary weather protection
- Battery or hand-crank radio
- Copies of prescriptions and insurance cards
- Infant supplies if relevant: formula, bottles, diapers
The main mistake in hurricane prep is waiting until the forecast track is certain. By then, fuel lines and store shelves may already be crowded. A hurricane bag should be ready before the season starts, not when watches turn into warnings.
How much emergency gear should cost
Emergency, disaster, and evacuation gear can be assembled in stages, and a sensible basic kit usually costs less than people fear.
Prices vary by brand, durability, and whether you buy individual items or a prebuilt bag. A prepacked kit often costs more and may include weak components like poor flashlights or thin ponchos. Building your own usually gives better value and lets you choose the exact sizes, medications, and chargers you need.
Below is a practical price range table for common items in U.S. retail markets. These are broad ranges, not guarantees.
| Item | Typical price range | Notes |
|---|---|---|
| 20–35L backpack or small duffel | $25–$100 | More if you want heavy-duty zippers and padded straps |
| Headlamp | $15–$60 | Choose one with easy battery access |
| Small flashlight | $10–$40 | Simple, durable models are fine |
| Battery/power bank | $20–$80 | Higher capacity usually costs more |
| NOAA weather radio | $25–$100 | Hand-crank models often cost more |
| N95 respirators, 10-pack | $10–$30 | Check sizing and storage conditions |
| Emergency blanket | $2–$10 each | Cheap, light, but limited insulation |
| Sleeping bag | $40–$200+ | Depends heavily on temperature rating |
| Water filter or purifier | $20–$100+ | Some handle bottles, others treat larger volumes |
| First-aid kit | $15–$75 | Consider building around a basic refillable kit |
| Waterproof document pouch | $10–$30 | A small fire-resistant safe is a separate item |
| Multi-tool | $20–$100 | Blade laws vary by location |
| Cash stash | Variable | Depends on how much you choose to keep on hand |
A realistic starter setup for one adult can be assembled in the low hundreds if you already own a backpack, phone charger, and some clothing. A more complete family setup with radios, water treatment, and weather layers will cost more. The expensive part is usually not the bag itself; it is duplicates, backups, and replacing medications or specialty items.
The limitation here is simple: low-cost gear can work, but thin construction fails sooner. A cheap zipper that jams under stress is not a bargain. A flashlight that only works with a rare battery size is not a bargain. Save money on branding, not on reliability.
How to choose gear that won’t fail when you need it
Emergency, disaster, and evacuation gear should be chosen for simplicity, battery life, and ease of use under stress.
A disaster is a bad time to learn a new interface. If a headlamp has five brightness modes, a hidden strobe, and a menu system, it may be clever but not useful. The same goes for radios, chargers, and water filters. Under stress, the gear should work with gloved hands, low light, and little attention.
Here is what to look for:
Choose battery flexibility
Gear that uses AA, AAA, or standard USB-C is easier to support than devices that need a proprietary charger. AA and AAA batteries are still widely available in stores, gas stations, and shelters. USB-C is now common enough that one cable can serve multiple devices.
A useful setup often includes:
- One headlamp that uses AA or AAA
- One power bank with USB-C input and output
- One flashlight with simple on/off control
- One radio that can run on replaceable batteries
Choose weather resistance, not fantasy toughness
A water-resistant rating helps, but “submersible” is not a substitute for care. Look for gear that can survive rain, dust, and a drop onto pavement. Keep important items in zip pouches or dry bags.
Choose size by carry time
A 5-minute evacuation bag can be heavier than a 30-minute walkout kit. If you may need to move on foot, cut weight. If you are evacuating by car and your hazard is a hurricane or wildfire, a slightly larger bag may be reasonable because the vehicle carries the load.
Choose items you can replace locally
A specialized stove that needs unusual fuel may be fine for camping, but less useful in a real evacuation if you cannot buy fuel where you land. For most people, ready-to-eat food, a simple water bottle, and a power bank are more practical than highly specialized cooking gear.
Choose gear that is legal where you live
A multi-tool with a blade, a baton, pepper spray, or a large knife can be restricted by local law, building rules, or transport rules. Know your jurisdiction before carrying anything with legal implications. If a tool creates more legal trouble than it solves, leave it out.
What a generic article often skips is the human factor. In an emergency, fine motor skills drop. People fumble zippers, misplace small parts, and forget where they stashed a battery. That is why I favor gear with large buttons, clear labels, and one obvious function.
What should go in a family or pet evacuation kit?
A family or pet evacuation kit should duplicate critical items, because one shared bag is not enough when people split up or one pack gets lost.
For a family, separate the kit into personal and shared parts:
- Each person gets medication, water, a snack, a light source, and a change of clothes
- The family gets shared radio, documents, chargers, food, and first aid
- Caregivers keep copies of school, medical, and custody-related records if relevant
- Children get a card with a parent’s phone number and out-of-area contact
- Older adults may need walkers, hearing aid batteries, reading glasses, or a list of medications
For pets, the bag should include:
- Food for at least 3 days
- Collapsible bowl
- Leash, harness, or carrier
- Vaccination records
- Medications
- Waste bags or litter supplies
- A recent photo in case the pet gets separated
Many shelters and hotels have rules for pets. Some require carriers, leashes, proof of rabies vaccination, or species-specific restrictions. Before you travel, check local shelter guidance or call ahead if possible. That means pet paperwork matters, not just kibble. A pet that cannot be accepted is not a companion on the road; it is an added crisis.
If you have infants, add formula, bottles, diapers, wipes, burp cloths, and a pacifier if used. If you have mobility limitations, build the kit around assistive devices, spare batteries, charging cords, and a plan for transport. If you take daily medication, include a printed med list with dosage and prescribing doctor, because memory fails under stress.
The honest trade-off: family kits are bulky. That is normal. The solution is not to omit essentials; it is to divide them between several bags and the vehicle. One person should not be the sole carrier of all critical items.
What belongs in a car emergency kit?
A car emergency kit should help you survive a breakdown, traffic jam, or forced overnight stay.
A vehicle kit is different from a house evacuation bag. It needs more cold-weather protection, more water, and items that help with roadside problems. It should live in the trunk or cargo area, not under loose groceries or sports gear.
A practical car kit includes:
- Jumper cables or a jump starter
- Tire inflator or sealant if appropriate for your vehicle
- Reflective triangles or a warning light
- Blanket or sleeping bag
- Water, changed seasonally if freeze risk is high
- Nonperishable snacks
- Flashlight and spare batteries
- Phone charger for the car
- Basic tools
- Ice scraper if you live in cold regions
- Cat litter or traction aid for slick roads
- First-aid kit
- Paper map
For winter driving, fold in gloves, hat, and extra socks. For desert or hot-climate driving, add more water and sun protection. For road trips through rural areas, a spare fuel canister may be appropriate only where legal and only if stored safely.
The key limitation is heat. A car trunk can become brutally hot in summer, which shortens the life of batteries, food, adhesive bandages, and medications. A vehicle kit needs regular checks. Replace melted, swollen, expired, or damaged items before the season changes.
Red flags when buying emergency gear
Emergency, disaster, and evacuation gear should worry you if the seller promises too much or hides basic details.
Some products are sold as preparedness theater. They look impressive in photos, but they fail the first time you use them.
Red flags include:
- No clear battery type
- No stated temperature rating for sleeping bags or blankets
- Flashlights with unknown lumen claims and vague runtime
- Radios without NOAA capability in the U.S.
- First-aid kits full of tiny plastic odds and ends but no gauze, tape, or gloves
- “Survival” kits that focus on gimmicks instead of water, light, and shelter
- Water filters with no clear certification or treatment method
- Bags that look rugged but have weak zippers and poor stitching
A useful standard to look for in water treatment gear is whether the product is certified to a relevant NSF/ANSI standard or clearly explains its treatment method. For example, NSF provides certification information for drinking water treatment units: https://www.nsf.org/consumer-resources/water-quality/water-filters-testing-treatment
For respirators, look for genuine N95 labeling and avoid suspiciously cheap masks with no credible manufacturer information. For emergency radios, confirm that the unit can receive the weather band used in your country. For first aid, prefer refillable kits built around real supplies rather than branded pouches stuffed with items you will not use.
A bargain kit is not always wrong. A cheap emergency blanket can be useful. A cheap radio that fails during a storm is not. Judge each item by its function, not by the marketing photo.
How to store, maintain, and rotate your gear
Emergency, disaster, and evacuation gear should be stored where you can reach it and checked often enough that it still works.
The right storage plan is as important as the right purchase. Gear hidden deep in a closet is less useful than a slightly smaller kit in a known spot. Put the main evacuation bag where it can be grabbed in seconds: near the front door, in a hall closet, or by the garage exit. Keep the car kit in the vehicle, not in the house.
A maintenance routine can be simple:
- Check batteries every 6 months
- Replace medications before expiration
- Review clothing at the start of each season
- Test flashlights and radios on a regular schedule
- Update documents when insurance, addresses, or phone numbers change
- Refresh food and water supplies before summer heat or winter freeze
- Reassess family needs after a move, birth, surgery, or new diagnosis
A lot of people build a kit once and never open it again. That is how you end up with dead batteries, worn-out shoes, and a phone cable for a device you no longer own. Put a reminder on the calendar twice a year, ideally when daylight saving time changes or at another memorable date.
One honest warning: a perfect kit does not replace an evacuation plan. Know where you would go, how you would leave, what route you would take, and who you would contact if the family splits up. Gear supports the plan. It does not create one.
The verdict: what gear matters most, and what can wait
The most important emergency, disaster, and evacuation gear is the gear that solves immediate survival problems in the first hours: water, light, communication, documents, medication, footwear, clothing, and a way to shelter.
If you only build one kit, make it a 72-hour evacuation bag with a small power bank, a headlamp, a NOAA or battery radio, copies of documents, a change of clothes, basic first aid, cash, and your prescription meds. If you live in a hazard-prone area, add hazard-specific items: N95 respirators for wildfire smoke, waterproof pouches for flood risk, warm layers for winter outages, and pet supplies if animals are part of the household.
What can wait? Fancy knives, oversized multitools, emergency gadgets with too many modes, and novelty “survival” items that look impressive but do very little. A good evacuation setup is plain, repetitive, and boring. That is exactly what you want when the road is crowded, the lights are out, and you have one chance to leave cleanly.
Drafted with AI; not yet reviewed by a person.