Last updated: October 25, 2026
Quick Answer: a 12-item pet evacuation checklist for hotels and shelters keeps the animal contained, documented, fed, and clean in shared housing.
In short: a good pet evacuation checklist for hotels and shelters keeps the animal contained, documents the pet’s status, and reduces friction in shared spaces. If a hotel, public shelter, or temporary housing site is your landing place after leaving home, the goal is simple: keep the pet calm, legal, clean, and easy to move. This Pet Evacuation Checklist for Hotels, Shelters, and Temporary Housing is built for that setting, and it works best when you keep the same supplies together.
Key Takeaways
- Use four basics first: containment, paperwork, food, and a cleaning plan.
- Plan for a 48-hour pet hotel stay with records, restraint gear, and supplies.
- A crate or leash setup should move the pet in under 30 seconds, with no escape risk.
- Routine, not luck, is what keeps a pet calm in shared lodging.
Pet evacuation checklist: the short version that actually works
A usable pet evacuation checklist starts with containment, paperwork, food, and a cleaning plan. That sounds basic, but those four pieces decide whether a pet can stay with you in a hotel room, a public shelter, or temporary housing for one night or two weeks.
Pack the items in one carrier or tote, then keep the most-used pieces on top. The point is not to build a full disaster kit here; the point is to make shared, short-term living workable. For the broader gear list that sits behind this guide, the hub on pet emergency gear covers the larger setup.
Start with the basics you will need within the first 24 hours:
- sturdy carrier or crate sized for the animal
- 6-foot leash and harness or collar
- vaccination records
- proof of rabies status if available
- 3 to 7 days of food
- collapsible bowl
- water bowl or bottle
- pet waste bags or litter supplies
- towel or washable bedding
- medication in original containers
- a simple cleaning spray and paper towels
- a recent photo of the pet in case of separation
That is the minimum set for most short stays. It is not elegant, but it is manageable. It also fits the reality of hotel rules and shelter rules, which usually care more about control and sanitation than about how nicely the bag is packed.
The hardest part is not the packing. It is the transition from your own home to a shared room where the pet cannot roam. That means every item on the checklist should have one job. If a thing is not helping with containment, feeding, sanitation, identification, or quiet, leave it behind.
What to pack for a pet hotel stay during evacuation
A pet hotel stay during evacuation needs records, restraint gear, and enough supplies for a predictable 48-hour stretch. That is the most useful lens because many people overpack decor and underpack proof. Hotel staff usually care about noise, damage, waste, and whether the pet can be removed quickly if needed.
Pack these documents together in a waterproof pouch or zip bag:
- vaccination records, especially rabies
- license tag number if your city uses one
- vet contact information
- medication list with doses written out
- microchip number, if your pet has one
- a copy of any pet policy paperwork the hotel gave you
If the pet is on a strict medication schedule, carry the medication in the original bottle or box. The label matters because it reduces confusion if you have to hand the pet to a sitter, front desk staff, or shelter volunteer for a short period.
For food, bring the brand the pet already eats. Sudden changes are one of the easiest ways to create a mess in a room without a yard or relief area. A 3-day supply is practical for most short relocations, and a sealed container or pre-portioned bags keep the food from attracting pests. If you use canned food, add a spoon and a lid that closes tightly.
A leash setup matters just as much as food. Use a standard 6-foot leash, not a retractable one, because fixed length gives better control in lobbies, elevators, stairwells, and parking lots. Add a harness if your pet pulls or slips collars easily. For cats, a harness can help with short, controlled movement, but it does not replace a secure carrier; if you are unsure, consult a veterinarian or shelter staff member before relying on it.
One detail many people miss: bring a printed photo of the pet and a note with the pet’s name, your name, your room number, and one emergency contact. If the animal bolts, you want that information ready before anyone starts searching the building.
For hotels that accept pets, see the hotel pet policy page before you arrive. For evacuation planning, the Red Cross pet disaster checklist is also a useful cross-check.
How to set up a crate and leash so the pet stays manageable
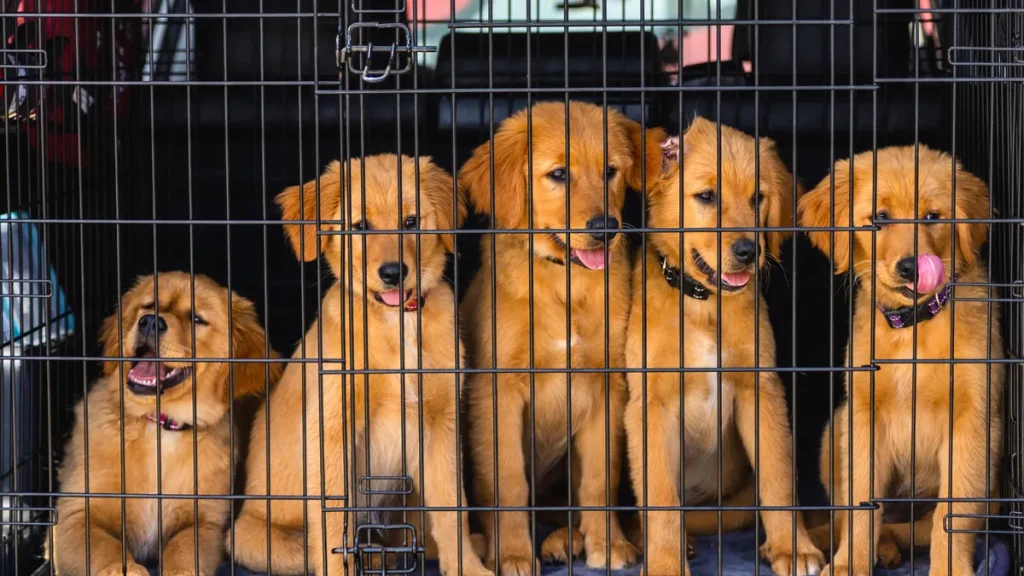
A crate and leash setup works when the animal can be moved in under 30 seconds and cannot slip out during a doorway rush. That is the real test in temporary housing, where elevators, loading areas, and shared hallways create more chances for escape than a normal home does.
Use a crate or carrier the animal already accepts. A brand-new crate can be the right size and still be the wrong choice if the pet panics in it. The carrier should allow the pet to stand, turn, and lie down without folding awkwardly. If the animal is small and airline-style hard-sided carriers make it calmer, choose that. If the pet is larger, use a travel crate with a secure latch and enough floor space for resting; if you are unsure about fit or ventilation, consult a veterinarian or shelter professional.
Make the setup before you need it:
- Place bedding inside the carrier or crate.
- Add a familiar item with the pet’s scent, such as a towel or blanket.
- Clip identification tags to the leash and harness, not just the collar.
- Test the latch, zipper, or door twice before the first move.
- Keep the leash looped around your wrist or over a shoulder while opening doors.
- Load food, bowls, and paperwork in a separate bag that stays outside the crate.
That sequence matters because shared housing punishes improvisation. If the leash is buried under supplies, the pet may get loose while you dig for it. If the carrier is too bare, the pet may scratch or vocalize more. If the pet wears only a collar, one hard pull can become an escape.
A common mistake is to leave the crate closed all day without short breaks. In a cramped room, that can turn a manageable animal into a stressed one. Instead, use brief, scheduled relief periods on a leash or harness in the designated area, then return the pet to the crate or mat. A few controlled outings are better than one long, chaotic one.
For route planning, the CDC pet travel guidance can help you avoid last-minute gaps.
How do I keep a pet calm in a hotel room or shelter?
A calm pet in a hotel room or shelter is the result of routine, not luck. The animal needs a predictable cycle for feeding, water, bathroom breaks, and quiet time, especially in a room where people are coming and going and sounds carry through walls.
Keep the first hour boring. Set down the crate, water, and bedding in one corner and avoid letting the pet explore the entire room at once. A smaller space is easier to learn and less likely to become a source of accidents. For dogs, take a leash walk as soon as the pet is settled and safe. For cats, keep the carrier open only when the room is secure and the litter setup is ready; if the room is crowded or unfamiliar, ask a shelter worker or veterinarian what setup is safest.
Feeding in shared spaces requires discipline. Feed the pet at the same times you would at home, then remove the bowl after the meal if the animal tends to guard food or scatter it. In a hotel, bowls left on the floor can tip onto carpet. In a shelter, food can attract other animals or create tension between families. A collapsible bowl that rinses in a sink is the easiest option.
Noise control matters more than many people expect. Keep barking, meowing, and door scratching down by using the crate, covering part of it with a light towel if that calms the pet, and avoiding long absences. If the animal is highly reactive, do not assume a thin hotel door will contain the sound. Use the most secure room arrangement available and choose the quietest corner; if the facility has a designated pet area, follow staff guidance on where to place the animal.
A few trade-offs are unavoidable. A pet that is very social may feel deprived in a crate-heavy setup. A pet that is anxious may not tolerate a public shelter well at all. That is not a failure of the checklist; it is a sign that the pet needs a quieter arrangement or a different temporary housing option. This guide is not meant for people who want a nervous animal to have free run of a shared room and hope for the best.
For emergency boarding decisions, the ASPCA emergency preparedness guidance can help you compare options.
What paperwork and proof should travel with the pet?
The right paperwork reduces delays because it answers the two questions staff usually ask first: is the pet healthy enough to stay here, and who is responsible for it? Keep the paperwork in one envelope or zip pouch, not scattered across a backpack and glove compartment.
Carry these items together:
- vaccination records
- rabies proof
- vet contact details
- pet license if your area requires one
- microchip number
- medication instructions
- proof of ownership if you have it
- contact information for an alternate caretaker
Vaccination records are the center of that stack. They are the fastest way to show that the pet has current protection status when a hotel, shelter, or housing program asks for it. If you do not have a printed copy, a saved PDF on your phone can help, but paper is safer when the battery is low.
Keep one clean, legible page with the pet’s identifying details: name, species, breed or mix, color, sex, age, and distinguishing marks. That page helps if the pet gets separated or if different staff members need to confirm the animal’s identity. A recent photo from the side and front is more useful than a glamorous portrait.
One practical caution: do not assume every location will accept the same paperwork. A hotel may want only proof of vaccination and a damage deposit policy, while a public shelter may ask for stronger documentation or may limit what kinds of pets can stay on site. Temporary housing providers can have their own rules about size, species, and cleaning. Call ahead if possible, but keep the paperwork on you either way.
If your pet takes medication, include the original prescription label whenever possible. That makes the drug easier to identify and reduces mistakes if someone else has to hand it over during a room change or an emergency transfer. For a printable copy of the checklist, use the link to the emergency pet paperwork page.
Temporary housing rules that change the checklist
Temporary housing rules change the checklist because the room, the lease, and the neighbors all matter. What works in a standalone house can fail fast in a furnished apartment, family shelter, or extended-stay hotel.
The biggest difference is control. In a hotel, the pet must be contained when housekeeping, maintenance, or other guests are nearby. In a public shelter, the pet may need to remain in a designated area or be moved in and out on a schedule. In temporary housing with roommates or shared corridors, the pet has to be quiet enough not to disturb the next room and clean enough not to create odor or allergy problems.
Build your kit around three rules:
- No loose pets in hallways or common rooms.
- No feeding tools that spill easily or leave residue.
- No gear that cannot be cleaned quickly with soap and water.
That means a heavy ceramic bowl may be bad fit for travel even if it is perfect at home. A washable mat beats an absorbent rug. A long tie-out in a crowded common area is usually a poor choice because it creates tripping and escape risks. A 6-foot leash gives more control than a long line in shared space.
The trade-off is privacy versus safety. Some people want the pet hidden away in a crate all day to avoid complaints. That can backfire if the animal becomes noisy, anxious, or overheated. A better pattern is short, supervised movement, then rest in a secure crate or designated pet area.
This is also where behavior management belongs. Bring treats if the pet responds well to them, but do not rely on food alone. Use routine, boundaries, and brief exercise. For dogs, short walks often work better than trying to “wear them out” in a room. For cats, a covered carrier, a familiar blanket, and a consistent litter setup can do more than toys.
For room setup ideas, the pet-friendly hotel tips page and the shelter intake guidance page give useful examples.
Mistakes that turn a short stay into a bigger problem
The biggest mistakes are overpacking the wrong items, underpacking records, and treating the hotel or shelter like home. Those errors cost time, create conflict with staff, and can put the pet at risk of being moved or refused.
A few failures show up again and again:
- Skipping vaccination records. Cost: delays, denial, or repeated questions at check-in. Do instead: keep paper copies in the same pouch as the leash and medication.
- Using a retractable leash in a lobby. Cost: less control and a greater chance of tangling or escape. Do instead: carry a fixed 6-foot leash.
- Feeding from open bags on the floor. Cost: mess, pests, and odor. Do instead: portion food into sealed bags or a snap-top container.
- Letting the pet roam when you answer the door. Cost: escape risk. Do instead: crate the animal before opening the door to staff or other guests.
- Assuming all shelters accept all pets. Cost: wasted time and stress. Do instead: confirm the shelter’s animal policy before arrival if you can.
The most damaging mistake is trying to manage a stressed pet with optimism instead of structure. A temporary room is not forgiving. One loose pet, one spilled bowl, or one missing record can create a chain of problems that takes hours to undo.
A good checklist is not about packing more. It is about making the pet easy to identify, easy to contain, and easy to care for in a place that was not built for animals.
Final checklist before you leave the room
Before you lock the door, make sure the pet can be moved, fed, and identified without hunting through bags. That final check takes 2 minutes and can save an hour of frustration.
Confirm these items are within reach:
- leash attached and ready
- crate or carrier closed properly
- vaccination records packed
- food for at least 2 to 3 days
- bowls, bedding, and waste supplies
- medication in original packaging
- a towel or blanket for cleaning and scent comfort
- phone number for a backup contact
Then do one last room scan. Look under the bed, behind the bathroom door, and near the exit for loose items that could be chewed, spilled, or left behind. If the pet is nervous, pause long enough to let it settle before the first move. A rushed exit is when collars slip, doors stay open too long, and people forget the paperwork pouch.
The best pet evacuation checklist for hotels and shelters is not fancy. It is controlled, compact, and honest about what a shared room can handle.
What should I pack for pet evacuation?
Pack the pet’s leash, carrier or crate, food for 3 days if possible, water bowl, waste bags or litter supplies, bedding, medication, and vaccination records. Add a recent photo of the pet and any contact details a hotel or shelter may need. Keep everything together in one bag or pouch so it is easy to grab in 30 seconds.
Drafted with AI; not yet reviewed by a person.